 A Barn Owl nestbox in a tree is the next best option if you do not have a suitable building. If you have a suitable tree, a tree box is easier and more practical than a box on a pole.
More about Barn Owl boxes for trees.
 How to make a Barn Owl tree nestbox – step by step photo instructions:
You will need:
- 8′ x 4′ sheet pressure treated 9mm plywood
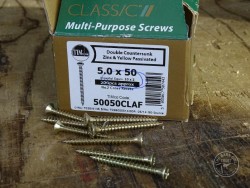
- 30mm; 50mm & 70mm screws
- Bostik or Everbuild All Weather Sealant (not silicone)
- Weatherproof wood glue (e.g. Evo-stick)
- Torch on roofing felt or Polyester roofing felt + tacks
Or buy a tree nestbox – ready made!
-

- 1. A suggested cutting plan (note that the battens on the edge of the exercise platform are inset at one end).
-

- 2. Internal battens are first attached to the back and front (see picture 10).
-

- 3. The back is pre-drilled with three holes for attaching the Tree Support.
-

- 4. Screw positions for the side sections.
-

- 5. Note that the front will be inset by 100mm at the top.
-

- 6. 30mm screws are used (except for attaching the Tree Support – see later on).
-

- 7. An ‘all weather’ sealant is applied immediately before the surfaces come together.
-

- 8. Get the sealant close to the edge so the plywood pieces are sealed to each other.
-

- 9. Attach the side leaving the overhang at the bottom.
-

- 10. In the background – note how the battens are attached to the front section.

-

- 12. We use BOSTIK or EVERBUILD ‘all weather’ sealant (not just silicone).
-

- 13. Remember that the front is inset by 100mm at the top.
-
- 14. 5 x 30 mm screws are used.
-

- 15. Sealant for the second side.
-

- 16. The second side goes on.
-

- 17. The view ‘up’ through the box before the floor is fitted.
-
- 18. Use larger 50mm screws for the floor – 5 along the front and back edges.
-

- 19. The floor is screwed into place.
-
- 20. Lay the box on its front and apply weatherproof glue.
-

- 21. Like this this one.
-
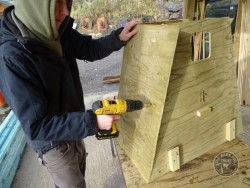
- 22. Now use two longer screws to secure the Tree Support.
-

- 23. This joint MUST be very strong so we use 70mm screws as well as glue.
-

- 24. Then we use 3 x 50mm screws from the inside outwards.
-

- 25. A good cordless drill-driver makes the job much easier.
-

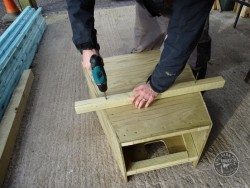
- 26. Now the lid goes on.
-

- 27. 30mm screws are ample for this.
-
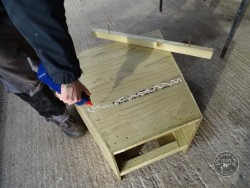
- 28. The Exercise Platform is now offered up. Note the downwards slope.
-

- 29. Note that the sides of the platform are angled inwards (see first picture).
-

- 30. If you get the angles right it should all come together like this.
-

- 31. Just 2 x 30mm screws in each side should suffice.
-

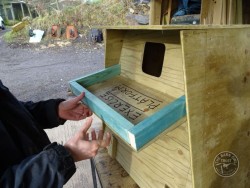
- 32. Check that the Inspection Hatch opens easily.
-

- 33. We use torch-on roofing felt that is guaranteed for 10 years.
-

- 34. You may prefer to use a thinner polyester felt and roofing tacks.
-

- 35. Please don’t use thin underfelt as it will not last long enough.
-

- 36. Here, Jasmin is heating the side overlaps. You must not let rain get into the box.
-

- 37. Hot felt can be ‘moulded’ nicely around corners.
-

- 38. This part attaches to the tree by nails or a UV-stable Rachet Strap.
-

- 39. The box hangs from it and then the two supports are nailed together.
-
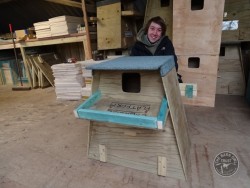
- 40. If you think this is all too much for you, why not buy one that Jasmin has made?
Click on a photo to scroll through the gallery. Click on the black background or press esc to return to this page.