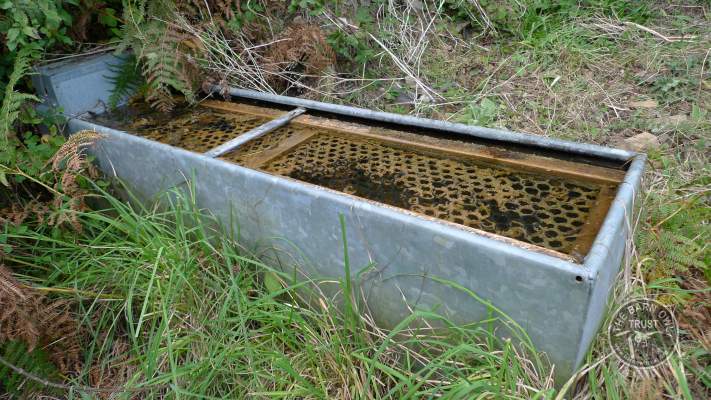
On one occasion we removed a dead Barn Owl from a cattle trough and tipped it over only to find the remains of another Barn Owl, 2 Little Owls and a Kestrel.
Why do Barn Owls get into deep water?
Like most birds, Barn Owls need to wash themselves in water. Natural places for birds to bathe, like ponds and streams, have shallow edges, and ditches have rough sides. Presumably, birds have little or no awareness of the danger associated with slippery materials like steel and plastic and don’t expect small bodies of water to be deep. It has been suggested that birds might jump into water upon seeing their own reflection, although we have not come across any evidence to support this idea.
When are Barn Owls most at risk?
Although there are records of drowning throughout the year, summer is the worst time for adults. After weeks of incubation and brooding, adult females can be quite soiled and may attempt to bathe in the nearest available water, which is often a water trough. This is particularly unfortunate as breeding adults are the most important birds in the owl population. It is possible that some birds do manage to get out of deep water and therefore possible that some might learn to avoid such containers. Late summer and autumn is the worst time for juveniles whose inexperience may also be a factor.
How can I prevent owls from drowning in my troughs?
The answer is to install purpose-made floats. These are easy to make, inexpensive, and can easily last over 10 years (but will eventually need replacing).
To find out how, either watch the video above: How to make a float or follow our step-by-step guide below: How to make a float.
Ideas that do NOT work: Floating a log or piece of timber in the water does not work. Draping something over the edge or having a long length of timber sticking out of the water are not likely to work and are unlikely to remain in place for very long. We have tried fitting rigid plastic door mats and bakers’ bread trays into water troughs and found them to be impractical.

What are floats made of?
 We use a simple frame of treated timber fitted with strong plastic mesh and polystyrene for permanent buoyancy. The incorporation of a buoyant material (such as expanded polystyrene) is essential – waterlogged wood sinks too easily. Once the frame is thoroughly soaked the mesh will lie just below the water surface and support the weight of a Barn Owl. When cattle, sheep, horses, or other stock drink, the float will easily sink and then come up again.
How to make a float :
Watch our instructional video on how to make a float.
Materials
- Lengths of 50mm x 25mm pressure-treated (tanalised) batten.
- Piece of strong plastic mesh (such as Nortene Geo-mesh).
- Lengths of 50mm x 25mm strips of expanded polystyrene.
- 40mm and 70mm galvanised nails and 100mm x 50mm plated posi-drive screws.
- 12.5mm galvanised staples.
Tools
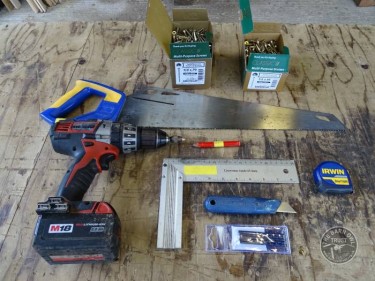
Hammer, wood saw, knife, secateurs, posi-drive screwdriver, drill and 5.5mm drill bit, tape measure, pencil.
Method
1. Measure the water trough, taking into account any slope inwards at the bottom. Make the float about 25mm smaller all the way round so that it won’t become stuck if the water level falls.
2. Cut 2 pieces of wood for each long side and one for each short side.
3. Use secateurs to cut the plastic mesh to the correct size.
4. Staple the short pieces of wood to the mesh (making sure that they are both on the same side of the mesh). Be generous with the staples – no more than 70mm apart – as the float may be subjected to a lot of wear and tear by livestock.
5.  Next, use 2 x 50mm screws at each end to fix both long pieces to one of the short pieces (this time, on the other side of the mesh).
6. Pull the mesh taut and fix the other ends onto the other short piece.
7. Use plenty of staples to fix the mesh to the wood along each long side.
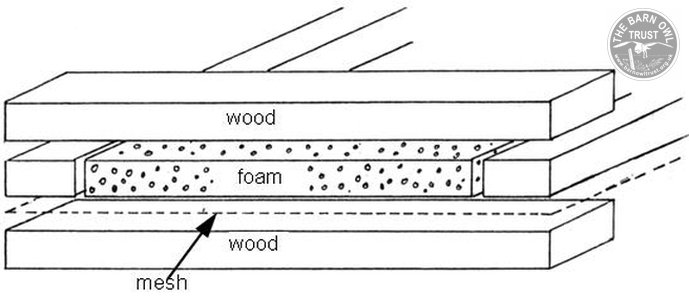
8. Cut lengths of polystyrene to fit along the long sides snugly, and secure on top of the mesh with 40mm nails.
9. Make a ‘sandwich’ along each long side by attaching the final long lengths of wood on top (see diagram). Fix them using two 50mm screws at each end.
10. Finally, turn the float over and hammer 70mm nails at an angle through the ‘sandwich’ (so that they do not poke through to the other side). If your wood is very dry, drill pilot holes to prevent the nails splitting the wood.
11.  When installing the float make sure it is the right way up. The polystyrene must be above the mesh so that when the wood becomes waterlogged the mesh is just below the surface of the water.
12. We suggest that all water containers with more than 120mm of water depth and within 200 metres of the nest are made safe.
NOTE: we have been assured (in writing) by the manufacturers that pressure-treated timber is safe to use in cattle drinking water.
Other relevant pages:
- The dangers of poor nestbox designs.
- The dangers of rat poison and how to control rats as safely as possible.
- The dangers of overhead wires and electrocution.


