Instructions for building a narrow Barn Owl nesting or roosting box that doesn’t take up too much room in an un-heated outbuilding or large shed.
-

- First make a 130 x 250mm hole that is visible from open countryside.
-
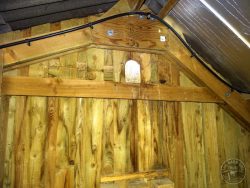
- Make the hole as high as possible.
-

- The wooden beam below the hole is not needed – it just happened to be there.
-

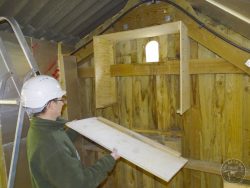
- We wanted to minimise how far the box projected into the interior space of the building…
-

- …So we chose the minimum front-to-back size = 400mm, and width 1000mm. Fitting the top.
-

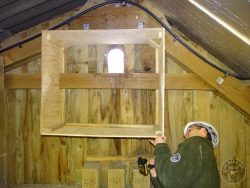
- Depth from the bottom of the hole to the bottom of the box is important = 500mm.
-

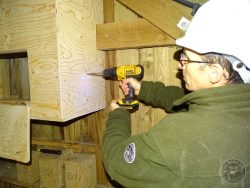
- Fitting the first side.
-

- Fitting the second side.
-

- Covering small gaps at the top (not essential).
-
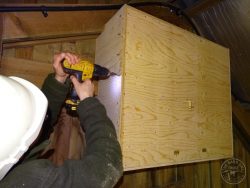
- We used 12mm softwood FSC plywood and 25x50mm battens.
-
- Fitting the floor (1000 mm wide x 400mm front-to-back).
-

- Covering any small gaps at the bottom is important.
-

- Ready for the back to be fitted.
-

- This is the inside of the back…
-

- … which incorporates a large inspection panel/door close to the bottom.
-

- The three little boxes below are for small hole-nesting birds like House Sparrows.
-
- Fitting the back (1000mm wide x 800mm high).
-
- A 10mm peep hole is drilled in each side 200mm above floor level.
-

- For ease of clearing out, always make the inspection panel/door large.
-

- Please don’t call us unless you really need to…
-

- … all the information you need is on our website.
-

- Good luck(!) and remember…
-

- … the creation of good foraging habitat is even more important.